How to install a shade sail
The fabric is the easy part. What decides whether the installation lasts is the geometry you plan and whether your attachment points can genuinely take the tension.
By Ryder M. · Published · Last updated
We compare published manufacturer specifications, warranty terms and owner-reported failure modes. We have not physically tested these structures. How we judge shade structures
Slat & Shade earns a commission on qualifying purchases made through links on this page. It costs you nothing extra and never changes what we recommend. Full disclosure
Part of Shade Sails
The short answer
Plan the geometry first with a pitch and, on a four-point sail, a twist. Confirm every attachment point can take real tension — a fascia board or a fence panel cannot. Allow 8-10% of the span for hardware, fit a turnbuckle at every corner, and tension progressively in rotation rather than one corner at a time.
Our picks at a glance
| # | Structure | Best for | Fabric | Price |
|---|---|---|---|---|
| 01 | 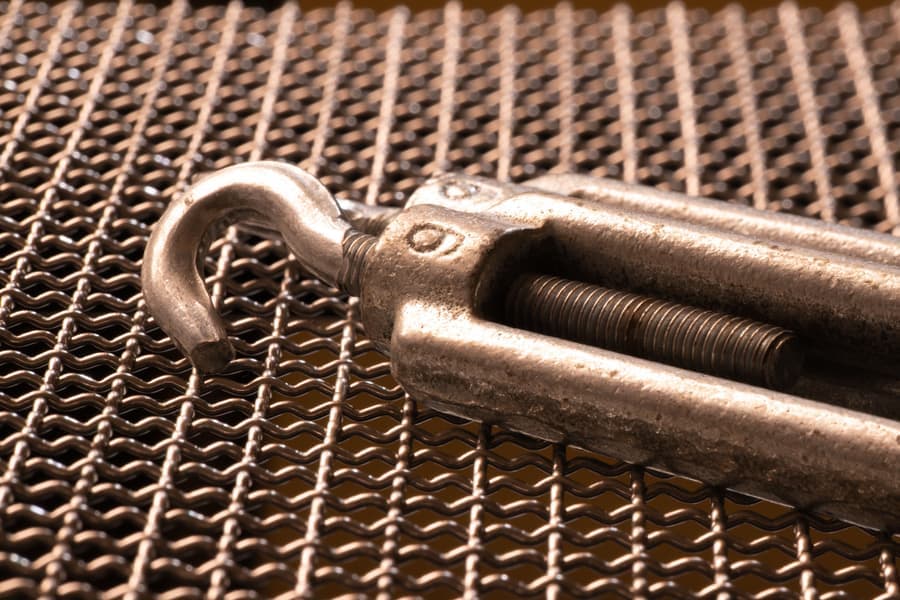 SUNNY GUARD Shade Sail Hardware Kit, 316 Stainless316 marine-grade stainless rather than 304 — the difference that decides whether your fixings survive a coastal or pool-side install. | What you need before you start | Not published by manufacturer | Check price on Amazon |
| 02 | 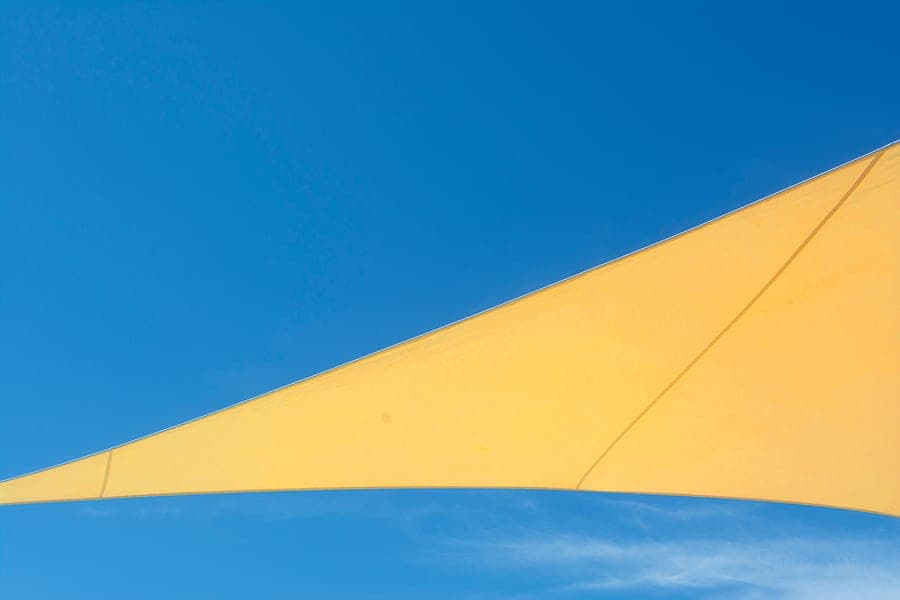 ColourTree Triangle Sun Shade Sail, 200 GSMA heavier 200 GSM fabric in the shape that tensions most predictably — three anchor points cannot fight each other the way four can. | Easiest first installation | 200 GSM HDPE, 95% UV block | Check price on Amazon |
| 03 | 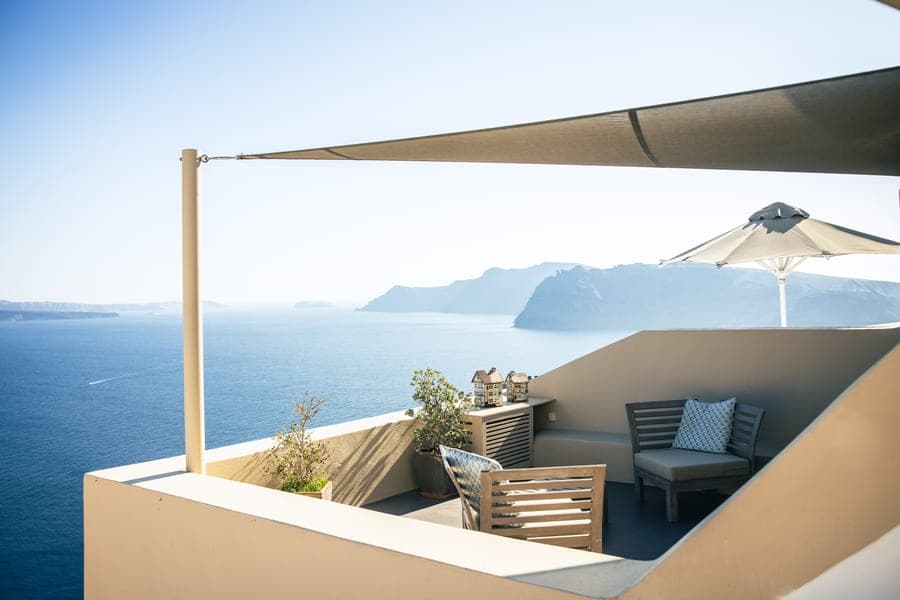 ColourTree Rectangle Sun Shade Sail, 190 GSMThe clearest published fabric spec in the category — 190 GSM virgin HDPE, 95% UV block, three-year warranty — with the hardware sold separately. | Best sizing options for an existing geometry | 190 GSM HDPE mesh, 95% UV block, breathable | Check price on Amazon |
| 04 |  Windscreen4less Cable Shade Sail, 260 GSMThe heaviest fabric and the longest warranty of any sail here — seven years — and the only one with a galvanized cable sewn through the perimeter. | Best for a long span | 260 GSM high-density polyethylene, UV 95 | Check price on Amazon |
The durability table
Every published figure we could source for these structures, in one place, with the manufacturer page each number came from. Where a cell reads "Not published by manufacturer", that figure does not exist in the manufacturer's own material — we do not estimate it and we do not copy one from another site.
| Model | Wind rating (mph) | Snow load | Frame | Roof | Anchoring required | Warranty | Spec source |
|---|---|---|---|---|---|---|---|
| SUNNY GUARD Shade Sail Hardware Kit, 316 StainlessTop pick | Not published by manufacturer | Not published by manufacturer | 316 marine-grade stainless steel | Not published by manufacturer | Turnbuckles, pad eyes, snap hooks, screws and expansion anchors; sized for triangle sails under 161 sq ft | Not published by manufacturer | SUNNY GUARD hardware kit product pageChecked 2026-09-26 |
| ColourTree Triangle Sun Shade Sail, 200 GSM | Not published by manufacturer | Not published by manufacturer | No frame — breathable HDPE fabric | 200 GSM HDPE, 95% UV block | Stainless steel D-rings at the corners; hardware sold separately | 3 years | ColourTree triangle shade sail product pageChecked 2026-09-26 |
| ColourTree Rectangle Sun Shade Sail, 190 GSM | Not published by manufacturer | Not published by manufacturer | No frame — 100% virgin (non-recycled) HDPE fabric, reinforced stitched seams | 190 GSM HDPE mesh, 95% UV block, breathable | Stainless steel D-ring at each corner; cable rope and hardware kits sold separately | 3 years under normal weather and usage | ColourTree rectangle shade sail product pageChecked 2026-09-26 |
| Windscreen4less Cable Shade Sail, 260 GSM | Not published by manufacturer | Not published by manufacturer | Steel-wired perimeter with galvanized cable and A-ring reinforcement | 260 GSM high-density polyethylene, UV 95 | Strengthened A-rings at the corners, steel wire reinforced edges | 7 years under normal weather conditions | Windscreen4less shade sails pageChecked 2026-09-26 |
Every pick in full
What you need before you start
SUNNY GUARD Shade Sail Hardware Kit, 316 Stainless
316 marine-grade stainless rather than 304 — the difference that decides whether your fixings survive a coastal or pool-side install.
- Wind rating
- Not published by manufacturer
- Snow load
- Not published by manufacturer
- Frame
- 316 marine-grade stainless steel
- Roof
- Not published by manufacturer
- Anchoring
- Turnbuckles, pad eyes, snap hooks, screws and expansion anchors; sized for triangle sails under 161 sq ft
- Warranty
- Not published by manufacturer
- Sizes
- M6 turnbuckles, 6 in. to 8 in. adjustable range
Buy this before the sail arrives, not after — the most common way a shade sail installation stalls is discovering mid-job that the hardware is a separate purchase.
316 marine-grade stainless steel, with turnbuckles, pad eyes, snap hooks, screws and expansion anchors, and M6 turnbuckles adjustable from 6 to 8 inches. That adjustment range is the working part: it is what lets you take up the initial tension and then take up the stretch that develops over the first few weeks.
Use snap hooks at the sail corners rather than shackles. It is a small decision with a large consequence: snap hooks turn taking the sail down from a two-hour job into twenty minutes, and a sail you can drop easily is a sail that comes down when the forecast turns. No sail publishes a wind rating, so being able to remove it is the actual safety feature.
316 rather than 304 if you are coastal or poolside, because chloride pitting will mark 304 within a couple of seasons and the corner is where the whole load sits.
Sized for triangle sails under 161 sq ft — a real limit. A bigger sail needs proportionally heavier hardware.
Skip it if: Your sail is larger than about 161 sq ft — size up rather than installing with hardware at its limit.
#ad Price shown as of September 26, 2026. How this site is funded
Specifications from SUNNY GUARD hardware kit product page, checked 2026-09-26.
Easiest first installation
ColourTree Triangle Sun Shade Sail, 200 GSM
A heavier 200 GSM fabric in the shape that tensions most predictably — three anchor points cannot fight each other the way four can.
- Wind rating
- Not published by manufacturer
- Snow load
- Not published by manufacturer
- Frame
- No frame — breathable HDPE fabric
- Roof
- 200 GSM HDPE, 95% UV block
- Anchoring
- Stainless steel D-rings at the corners; hardware sold separately
- Warranty
- 3 years
- Sizes
- Not published by manufacturer
If this is your first sail, install a triangle. The reason is geometric and it removes the single biggest source of installation error.
Three points are always a flat plane. That means all three corners can be tensioned hard and the fabric sits taut, with no fight between them. A four-point sail is not necessarily planar: tension all four level and the middle goes slack, and correcting it means deliberately setting two diagonally opposite corners high and two low to build a twist into the fabric. That is a real technique and it is the step people skip.
So a triangle gives you 25% fewer fixings, one fewer thing to get wrong, and a taut surface almost by default.
200 GSM HDPE with 95% UV block, stainless steel D-rings at the corners, three-year warranty. Breathable, so it spills wind and cannot pool.
Hardware sold separately — three turnbuckles and three fixings for a triangle, which also makes stepping up to 316 stainless an easier decision.
Skip it if: You need to cover a rectangular area efficiently — two triangles means six fixings rather than three.
#ad Price shown as of September 26, 2026. How this site is funded
Specifications from ColourTree triangle shade sail product page, checked 2026-09-26.
Best sizing options for an existing geometry
ColourTree Rectangle Sun Shade Sail, 190 GSM
The clearest published fabric spec in the category — 190 GSM virgin HDPE, 95% UV block, three-year warranty — with the hardware sold separately.
- Wind rating
- Not published by manufacturer
- Snow load
- Not published by manufacturer
- Frame
- No frame — 100% virgin (non-recycled) HDPE fabric, reinforced stitched seams
- Roof
- 190 GSM HDPE mesh, 95% UV block, breathable
- Anchoring
- Stainless steel D-ring at each corner; cable rope and hardware kits sold separately
- Warranty
- 3 years under normal weather and usage
- Sizes
- 14 sizes, 8 x 10 ft to 16 x 20 ft
A sail has to suit the attachment points you already have, and fourteen sizes from 8 x 10 ft to 16 x 20 ft is the widest range here — which on an installation page is the practically useful specification.
The sizing rule that catches people: the sail is smaller than the span. You need roughly 8-10% of the span as slack for hardware — the turnbuckles, snap hooks and rings all take up length, and you need the turnbuckles to start well short of their travel limit so they have room to take up stretch later. A sail sized to the exact distance between fixings cannot be tensioned at all.
190 GSM 100% virgin non-recycled HDPE with 95% UV block, reinforced stitched seams, stainless D-rings, three-year warranty.
On a four-point installation, plan the twist before you buy. Two corners high and two low changes the effective diagonal, so decide the heights during planning rather than after the sail is on the ground.
Skip it if: The span is long and exposed — a cable-edged sail holds its shape better under load.
#ad Price shown as of September 26, 2026. How this site is funded
Specifications from ColourTree rectangle shade sail product page, checked 2026-09-26.
Best for a long span
Windscreen4less Cable Shade Sail, 260 GSM
The heaviest fabric and the longest warranty of any sail here — seven years — and the only one with a galvanized cable sewn through the perimeter.
- Wind rating
- Not published by manufacturer
- Snow load
- Not published by manufacturer
- Frame
- Steel-wired perimeter with galvanized cable and A-ring reinforcement
- Roof
- 260 GSM high-density polyethylene, UV 95
- Anchoring
- Strengthened A-rings at the corners, steel wire reinforced edges
- Warranty
- 7 years under normal weather conditions
- Sizes
- Not published by manufacturer
If the span between your attachment points is long, the edge construction matters more than the fabric weight — and this is the sail built for it.
A galvanized cable runs through the perimeter hem, terminated into strengthened A-rings at the corners. Over a long span the edge is what holds the shape: a webbing edge distorts under load and puts a wave in the sail, and once there is a wave the wind gets hold of it. A cable edge stays straight and spreads corner tension along the edge rather than concentrating it at a ring.
260 GSM HDPE, UV 95, seven-year warranty — the heaviest fabric and the longest term in the category.
Plan for the weight during installation. A 260 GSM cable sail over a large span is a genuinely heavy object to get up on a ladder and hold in position while a corner is connected. This is a two-person job and the second person is not optional.
And tension it in rotation, a little at each corner in turn, rather than pulling one corner tight and moving on — on a cable-edged sail especially, uneven tensioning puts a permanent distortion into the perimeter.
Skip it if: You are working alone. This sail is heavy and needs two people to position safely.
#ad Price shown as of September 26, 2026. How this site is funded
Specifications from Windscreen4less shade sails page, checked 2026-09-26.
Plan the geometry before you buy anything
Most shade sail problems are decided at this stage, before any hardware is purchased, and the planning costs nothing but an afternoon with a tape measure.
- 01Identify your candidate attachment points and measure between them. House walls, garage corners, existing substantial posts, and the positions where you could set new posts.
- 02Decide the pitch. One edge needs to be appreciably higher than the other so the sail sheds water and deflects wind rather than catching it square. A flat sail is the most common installation mistake — it pools when it rains and presents its full area to wind from any direction.
- 03On a four-point sail, decide the twist. Two diagonally opposite corners high, two low. This is what turns a four-point sail from a flat plane with slack in the middle into a genuinely taut, stiffer surface. Decide the heights now, because they change the effective diagonal and therefore the sail size.
- 04Subtract the hardware allowance. You need roughly 8-10% of each span for turnbuckles, hooks and rings — and you want the turnbuckles starting well short of their travel limit so they have room to take up stretch later.
- 05Check the sun. Stand in the space at the time of day you actually want shade and see where the shadow would fall. A sail sized and positioned for noon may do nothing at 5pm, when the sun is low and arriving under it rather than through it.
- 06Check clearance underneath. Head height at the low corner, and enough room for a door or a gate to open under the low edge.
- 07Then choose the sail size, from the range that fits your adjusted spans.
What your attachment points have to take
This is where installations fail structurally, and it fails the host rather than the sail.
A properly tensioned sail pulls hard, continuously, for years. That load is not a static hang — it is tension in the plane of the fabric, increasing in wind, and it is trying to pull your attachment points toward each other. Underestimating it is the most consequential mistake on this page.
What cannot take it: a fascia board (fixed to rafter ends, not designed for lateral load), a fence panel or fence post set shallow in soil, gutter brackets, a thin timber pergola rail, or a wall fixing into brick or block that has not gone into solid material. Each of these gives way with the sail still attached, and the damage is to the structure rather than to the sail.
What can: a masonry wall with a properly rated fixing into solid material; a structural post set in concrete below your region's frost depth; a rafter or a beam, reached through the fascia rather than fixed to it; the framing of a substantial existing structure.
Purpose-set posts are the answer where nothing suitable exists, and they have to be set for tension rather than compression — which means a deeper footing than a fence post, angled slightly away from the sail so the tension pulls them toward vertical rather than past it. Frost depth varies by region and your building department holds the figure. This is the part of a sail installation that is genuinely comparable in effort to anchoring a pergola.
And where a tree is the attachment point: trees move, grow and are alive. Use a strap system that does not girdle the trunk, expect to adjust it, and accept that a tree in wind is a moving anchor.
Tensioning properly
The fabric arrives loose and the installation is finished when it is taut. How you get there matters.
- 01Connect all corners loosely first, with every turnbuckle wound most of the way open so it has full travel available.
- 02Tension in rotation, a little at each corner in turn, going round repeatedly. Do not pull one corner fully tight and move on — that drags the fabric out of position and can put a permanent distortion into the perimeter, especially on a cable-edged sail.
- 03Watch the edges as you go. They should stay straight. A curving or waving edge means uneven tension, and it is easier to correct now than after everything is tight.
- 04Tension until the fabric is genuinely taut, not merely unwrinkled. A sail that looks flat and has any give in it will be slack within a season. This is the step people under-do.
- 05Then hose it and watch the water. It should run off decisively to a defined low point. If it hesitates or collects anywhere, the pitch is insufficient and you re-rig rather than tighten further.
- 06Re-tension after two to four weeks. Fabric does most of its initial stretching early, and this is the single most valuable maintenance action in the life of the sail.
- 07Then annually, and check the turnbuckles have travel left. A turnbuckle at the end of its range is no longer a tensioner, and that is the point to re-rig rather than keep turning.
Common installation mistakes
- Installing it flat. The most common one. No pitch means pooling in rain and full area presented to wind from every direction. A visible slope is not optional.
- Sizing the sail to the exact span. You need 8-10% for hardware, and turnbuckles that start near their limit cannot take up stretch later.
- Tensioning all four corners level on a four-point sail. Produces slack in the middle, which is exactly what wind gets hold of. Two corners high, two low.
- Fixing to a fascia board, fence or gutter. The host fails, not the sail, and it takes part of your building with it.
- Skipping turnbuckles. Then there is no way to take up stretch, and the sail's tension is whatever it was on day one, declining. Almost every sail failure starts here.
- Mixing metals at a connection. Galvanized in contact with stainless in a wet environment sets up galvanic corrosion and the galvanized part goes first. Keep one grade per corner.
- Leaving it up. No sail publishes a wind rating or a snow load. Snap hooks and a willingness to use them outlast any fabric upgrade.
Installing a waterproof sail
Everything above applies and three things tighten considerably, because a coated panel behaves differently from a mesh.
The pitch requirement becomes structural rather than advisable. A mesh cannot pool because water passes through; a waterproof sail with insufficient slope will pool, the weight deepens the deflection, and the deflection collects more water. That loop ends at a corner ring or a seam. Hose it and watch — water must run off decisively, with no hesitation anywhere.
The hardware works harder. A waterproof panel catches all the wind a mesh would have spilled, and can carry collected water on top of that. Size the hardware up relative to what you would use for a breathable sail of the same area.
Re-tensioning maintains the pitch, not just the tension. A sail that has stretched has lost its slope, and a sail that has lost its slope pools. So on a waterproof sail the annual re-tension is what stops it failing rather than merely what keeps it looking right.
Best waterproof shade sails covers the product side, and HDPE vs waterproof shade fabric covers whether you want one at all.
Questions people ask
How do I install a shade sail?
What can I attach a shade sail to?
How much slack do I need for shade sail hardware?
How tight should a shade sail be?
Do I need posts to install a shade sail?
Should a shade sail be pitched or flat?
Can I attach a shade sail to a tree?
How long does it take to install a shade sail?
Where these figures came from
- SUNNY GUARD shade sail hardware kit — 316 marine-grade stainless, turnbuckles adjustable 6-8 in., pad eyes, snap hooks, expansion anchors, sized for triangles under 161 sq ft
- ColourTree rectangle shade sail — 190 GSM virgin HDPE, 14 sizes from 8x10 to 16x20 ft, stainless D-rings, cable rope and hardware sold separately
- ColourTree triangle shade sail — 200 GSM HDPE, 95% UV block, stainless D-rings, 3-year warranty
- Windscreen4less shade sails — 260 GSM cable line with galvanized cable and A-ring reinforcement, UV 95, 7-year warranty
Found an error? Tell us and we will correct it within seven days and note the change on the page with a dated line — see our editorial policy.