How to level ground for a gazebo
A gazebo is a rigid assembly of pre-drilled parts. Ground that is out by an inch across the footprint turns the last roof panel into a part that does not fit — and there is no adjusting it out.
By Ryder M. · Published · Last updated
We compare published manufacturer specifications, warranty terms and owner-reported failure modes. We have not physically tested these structures. How we judge shade structures
Slat & Shade earns a commission on qualifying purchases made through links on this page. It costs you nothing extra and never changes what we recommend. Full disclosure
Part of Wind, Snow & Anchoring
The short answer
Level the ground for a gazebo to within about a quarter of an inch across the whole footprint, measured post base to post base with a string line and a level. Set out from the published base dimensions rather than the roof size, compact the sub-base before you check level, and make the final adjustment with shims under the post plates rather than by moving soil.
Our picks at a glance
| # | Structure | Best for | Wind rating | Price |
|---|---|---|---|---|
| 01 | 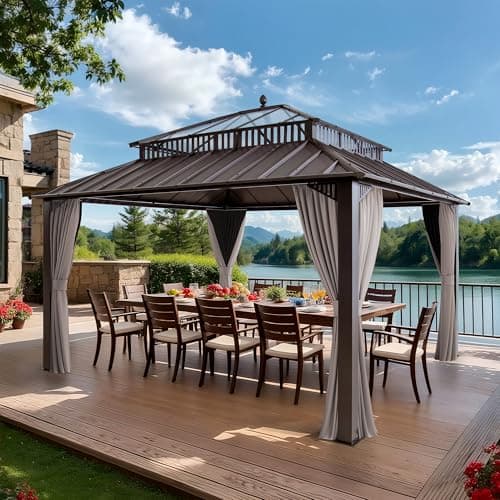 Sunjoy Kingston 12 x 14 Aluminum Gazebo with Steel RoofPublishes both a wind rating and a snow figure — but the snow figure is a whole-roof total, not a per-square-foot load, so it is not directly comparable to anyone else's. | Why you set out from the base, not the roof | 50 | $1,017.00 · View on Amazon |
| 02 | 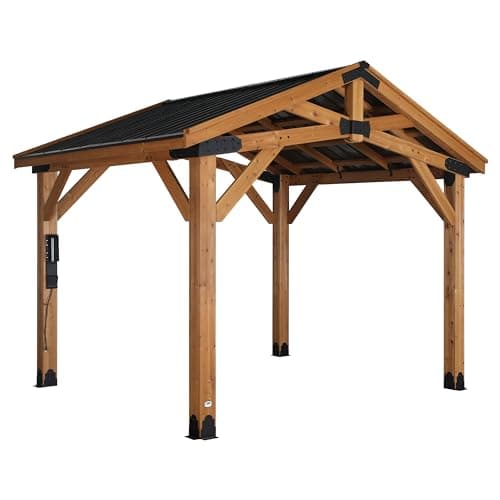 Backyard Discovery Norwood Cedar GazeboThe only gazebo we can find that publishes a 100 mph wind rating and a convertible snow figure — and it converts to roughly 56 lb/ft², several times any other hardtop here. | Where level and anchoring become the same job | 100 (Pro-Tect tested; product must be anchored per the manual) | $1,999.00 · View on Amazon |
| 03 | 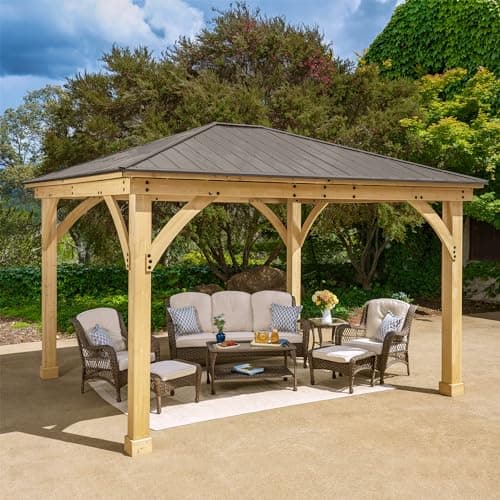 Yardistry Meridian 12 x 14 Cedar GazeboThe only structure here with 6x6 cedar posts and a five-year rot warranty — and it publishes no wind or snow figure at all. | The manufacturer that tells you why anchoring is yours | Not published by manufacturer | $2,124.99 · View on Amazon |
The durability table
Every published figure we could source for these structures, in one place, with the manufacturer page each number came from. Where a cell reads "Not published by manufacturer", that figure does not exist in the manufacturer's own material — we do not estimate it and we do not copy one from another site.
| Model | Wind rating (mph) | Snow load | Frame | Roof | Anchoring required | Warranty | Spec source |
|---|---|---|---|---|---|---|---|
| Sunjoy Kingston 12 x 14 Aluminum Gazebo with Steel RoofTop pick | 50 | 3,000 lb across the entire roof (not a per-square-foot rating) | Aluminum and steel | Galvanized steel, two-tier vented | Pre-drilled ground plates: included stakes for soft ground, expansion bolts for hard surfaces (bolts not included) | Not published by manufacturer | Sunjoy Kingston product pageChecked 2026-09-26 |
| Backyard Discovery Norwood Cedar Gazebo | 100 (Pro-Tect tested; product must be anchored per the manual) | 6,700 lb across the roof, or up to 30 in. of snow (12 x 10 ft model — roughly 56 lb/ft²) | 100% cedar, 6 in. x 6 in. posts, galvanized steel hardware | 29-gauge galvanized steel peak roof, thermal insulated | Mandatory. Product must be anchored as specified in the instruction manual | 5 years | Backyard Discovery Norwood 12x10 product pageChecked 2026-09-26 |
| Yardistry Meridian 12 x 14 Cedar Gazebo | Not published by manufacturer | Not published by manufacturer | 100% premium cedar, 6 in. x 6 in. posts with heavy corner gussets | Rust-proof coffee-brown aluminum | Post mounting brackets supplied; anchoring hardware is not, because mounting surfaces vary | 1 year on materials and workmanship; 5 years on lumber against rot and decay | Yardistry Meridian 12x14 product pageChecked 2026-09-26 |
Every pick in full
Why you set out from the base, not the roof
Sunjoy Kingston 12 x 14 Aluminum Gazebo with Steel Roof
Publishes both a wind rating and a snow figure — but the snow figure is a whole-roof total, not a per-square-foot load, so it is not directly comparable to anyone else's.
- Wind rating
- 50
- Snow load
- 3,000 lb across the entire roof (not a per-square-foot rating)
- Frame
- Aluminum and steel
- Roof
- Galvanized steel, two-tier vented
- Anchoring
- Pre-drilled ground plates: included stakes for soft ground, expansion bolts for hard surfaces (bolts not included)
- Warranty
- Not published by manufacturer
- Sizes
- Roof 12 x 14 ft; base 11 x 13 ft; height 11.02 ft
The clearest example on this site of the dimension problem that causes most levelling mistakes.
Roof 12 x 14 ft; base 11 x 13 ft; height 11.02 ft. Both figures published. If you level and mark out a 12 x 14 rectangle you have prepared the wrong area — the posts land a foot inside it in each direction, and the ground under the posts is what has to be flat.
Pre-drilled ground plates: included stakes for soft ground, expansion bolts for hard surfaces, bolts not included. Pre-drilled is the word that sets your tolerance. The holes are at fixed centers, so your post positions are not negotiable once the frame is assembled — which means the marking out has to be right before anything is unboxed.
50 mph published wind rating. Relevant here because the rating assumes those plates are bolted flat to a sound surface. A plate sitting on a high spot with a gap under one edge is not a fixed plate, whatever the bolt torque says.
A galvanized steel two-tier vented roof. Steel panels are rigid. On a frame that is out of level, the panels are the part that announces it — the last one does not line up with its fixing holes, and no amount of persuasion changes that.
Skip it if: You have not measured your paving against the base dimension yet. Do that before ordering anything at this footprint.
#ad Price shown as of November 11, 2026. How this site is funded
Specifications from Sunjoy Kingston product page, checked 2026-09-26.
Where level and anchoring become the same job
Backyard Discovery Norwood Cedar Gazebo
The only gazebo we can find that publishes a 100 mph wind rating and a convertible snow figure — and it converts to roughly 56 lb/ft², several times any other hardtop here.
- Wind rating
- 100 (Pro-Tect tested; product must be anchored per the manual)
- Snow load
- 6,700 lb across the roof, or up to 30 in. of snow (12 x 10 ft model — roughly 56 lb/ft²)
- Frame
- 100% cedar, 6 in. x 6 in. posts, galvanized steel hardware
- Roof
- 29-gauge galvanized steel peak roof, thermal insulated
- Anchoring
- Mandatory. Product must be anchored as specified in the instruction manual
- Warranty
- 5 years
- Sizes
- 10 x 10, 12 x 10, 14 x 10, 14 x 12, 16 x 12, 20 x 12 and 24 x 12 ft
The structure that makes the strongest case for getting this right, because its published rating depends entirely on the anchoring sitting flat.
Anchoring is mandatory, as specified in the instruction manual, and the published rating is 100 mph Pro-Tect tested. An anchor fixed through a post plate that is not bearing evenly on the surface is loaded in bending rather than in shear. That is the failure mode that turns a rated structure into an unrated one.
100% cedar with 6 in. x 6 in. posts and galvanized steel hardware. Heavy timber posts make the level question less forgiving, not more — a 6x6 post sitting on a high point concentrates a great deal of weight onto a small area of whatever is underneath it.
6,700 lb across the roof, or up to 30 in. of snow on the 12 x 10 ft model. A loaded roof pushes all of that down through four post bases. Any one of them standing on soft or uneven ground is where the settlement shows up, and settlement after assembly racks a rigid frame.
Sizes 10 x 10 through 24 x 12 ft. The bigger footprints are harder to get flat across, because a given slope over a longer run is a bigger height difference.
Skip it if: Your site slopes enough to need a retaining edge. That is a groundwork job before this is a gazebo job.
#ad Price shown as of November 11, 2026. How this site is funded
Specifications from Backyard Discovery Norwood 12x10 product page, checked 2026-09-26.
The manufacturer that tells you why anchoring is yours
Yardistry Meridian 12 x 14 Cedar Gazebo
The only structure here with 6x6 cedar posts and a five-year rot warranty — and it publishes no wind or snow figure at all.
- Wind rating
- Not published by manufacturer
- Snow load
- Not published by manufacturer
- Frame
- 100% premium cedar, 6 in. x 6 in. posts with heavy corner gussets
- Roof
- Rust-proof coffee-brown aluminum
- Anchoring
- Post mounting brackets supplied; anchoring hardware is not, because mounting surfaces vary
- Warranty
- 1 year on materials and workmanship; 5 years on lumber against rot and decay
- Sizes
- Roof 12 x 14 ft; base 10 ft 10⅜ in. x 12 ft 10⅜ in.
Included for a single published sentence that explains the whole problem better than any guide can.
Post mounting brackets are supplied; anchoring hardware is not, because mounting surfaces vary. That is the manufacturer saying out loud that it cannot know what you built. Levelling and surface preparation is the part of a gazebo install nobody can ship you, which is exactly why it is where most installs go wrong.
Roof 12 x 14 ft; base 10 ft 10⅜ in. x 12 ft 10⅜ in. Published to the eighth of an inch. If a manufacturer is specifying a base dimension to that precision, marking out approximately is not going to work — measure, mark, check the diagonals, and only then start preparing.
100% premium cedar with 6 in. x 6 in. posts and heavy corner gussets. Corner gussets stiffen the frame, which is good for strength and unhelpful for forgiveness: a stiffer frame has less ability to absorb a twist from uneven ground.
One year on materials and workmanship; five years on lumber against rot and decay. The rot clock is a levelling issue too. A post base sitting in a low spot where water collects is the one place rot starts on an otherwise sound cedar structure.
Skip it if: You are mounting onto an existing deck. The bracket question changes — [deck shade solutions](/canopies/deck-shade-solutions) covers what a deck can carry.
#ad Price shown as of November 11, 2026. How this site is funded
Specifications from Yardistry Meridian 12x14 product page, checked 2026-09-26.
The tolerance, and why it is tighter than you expect
Work to about a quarter of an inch across the whole footprint. Not a quarter of an inch per foot — a quarter of an inch total, post base to post base. That sounds fussy until you remember what you are assembling: pre-drilled steel or timber parts whose holes are at fixed centers.
The symptom of getting it wrong appears at the roof, not at the base. A frame that is out of level by half an inch across 12 feet is also out of square, because the diagonals no longer match. You will get three roof panels on and discover the fourth does not reach its fixings. There is no adjustment to make at that point; the frame has to come apart.
And the second symptom appears a year later. A post plate bearing on a high spot with a gap under one edge puts its anchor bolt into bending. Add a season of wind loading and the bolt works loose, which is the quiet failure that ends up being blamed on the hardware.
Level matters more than flat, and both matter more than pretty. A slight consistent fall for drainage across a slab is fine and often desirable; a hump in the middle of the footprint is not. What you are protecting is the geometry between four or more fixed points.
The method, start to finish
- 01Find the published base dimensions — not the roof size — and mark that rectangle on the ground with pegs and string.
- 02Check the diagonals: both measurements must match, or the footprint is a parallelogram and nothing will line up.
- 03Strip the turf and topsoil across the whole marked area plus about a foot of margin on every side.
- 04Dig out to a consistent depth — around 4 in. for a gravel base — working to the lowest corner rather than to an average.
- 05Lay and rake the sub-base material, then compact it in two or three shallow passes rather than one deep one.
- 06Run a string line between opposite pegs with a line level, and check the surface against it at every post position and at the center.
- 07Correct high spots by removing and re-compacting, never by adding loose material on top — loose fill settles under load.
- 08Re-check all four post positions against each other with a long level or a laser, and get the spread inside a quarter of an inch.
- 09Set the frame out dry, confirm every post plate bears fully on the surface, and shim any that does not before drilling anything.
- 10Only then anchor, following the manufacturer's specified method and torque.
The two steps people skip are the diagonals and the shimming. Checking diagonals takes two minutes and prevents the single most expensive mistake in this job. Shimming under a post plate is the legitimate way to take out the last sixteenth of an inch — far better than trying to adjust soil under a frame that is already assembled.
Compact in shallow passes. A 4 in. layer of gravel dumped and compacted once stays loose underneath and settles over the first winter, which un-levels a structure you spent a day getting right.
Levelling on each surface
On a gravel base, you have the most control and the most work. Excavate, lay, compact, check, correct. It is the standard answer for a gazebo on a lawn and it also solves drainage, which is the other thing a post base cares about. Gazebo foundation options covers depths and what each base can carry.
On an existing concrete slab, you are not levelling, you are measuring. The slab is what it is. Check it across the footprint and decide whether the fall is within tolerance; if it is not, the answer is shims under the post plates or a self-levelling screed, not a crowbar. Check slab thickness too, because expansion anchors need depth.
On pavers, lift them. Setting a post plate on a paver laid on sand puts the whole load of a post onto a bedding layer designed for footfall. The correct method is to lift the pavers at each post position and fix into what is underneath, then cut them back around the plate.
On a lawn you intend to keep as lawn, accept that you still need a bearing surface at each post. A plate on turf sinks unevenly, which is the slow version of the problem this page is about. Pads or small footings at each post position are the minimum.
On a slope, stop and treat it as groundwork. Anything more than a gentle fall needs cutting into the high side and retaining it, or a pier foundation with posts cut to length. Trying to shim your way out of a real slope ends with a structure standing on a stack of packers.
Mistakes that cost a day
- Marking out the roof dimension. The posts land inside it. Three of the structures on this page publish base and roof figures that differ by a foot or more.
- Levelling only the four post positions. The center matters too — a hump in the middle fouls the floor, the furniture and, on some models, a central support.
- Compacting once, deeply. Loose material under a compacted crust settles over the first wet season and takes your level with it.
- Adding loose gravel to raise a low post. It will settle. Dig the others down instead, or shim the plate.
- Assembling the frame before checking that every plate bears flat. A dry set-out takes twenty minutes and is the last cheap moment in the job.
- Anchoring into a thin decorative slab. It will not hold under load. How to secure a gazebo covers minimum depths and what to do when the slab is too thin.
- Leaving a post base in a low spot. Water collects there, and on a timber structure that is where the five-year rot warranty gets tested.
Questions people ask
How level does the ground need to be for a gazebo?
How do you level ground for a gazebo?
Should I mark out the roof size or the base size?
Can you put a gazebo on uneven ground?
Do you need a concrete base for a gazebo?
What happens if a gazebo is not level?
Can you level the ground after the gazebo is up?
How deep should a gravel base for a gazebo be?
Where these figures came from
- Sunjoy Kingston 12 x 14 aluminum gazebo — roof 12 x 14 ft, base 11 x 13 ft, height 11.02 ft, 50 mph wind rating, pre-drilled ground plates with stakes for soft ground and expansion bolts (not included) for hard surfaces
- Backyard Discovery Norwood cedar gazebo — anchoring mandatory as specified in the instruction manual, 100 mph Pro-Tect tested, 6,700 lb across the roof or up to 30 in. of snow on the 12 x 10 model, 100% cedar with 6 in. posts and galvanized steel hardware
- Yardistry Meridian 12 x 14 cedar gazebo — post mounting brackets supplied but anchoring hardware is not, because mounting surfaces vary; roof 12 x 14 ft, base 10 ft 10⅜ in. x 12 ft 10⅜ in., 6 in. cedar posts with heavy corner gussets, 5 years on lumber against rot and decay
Found an error? Tell us and we will correct it within seven days and note the change on the page with a dated line — see our editorial policy.